Knowledge Base Categories |
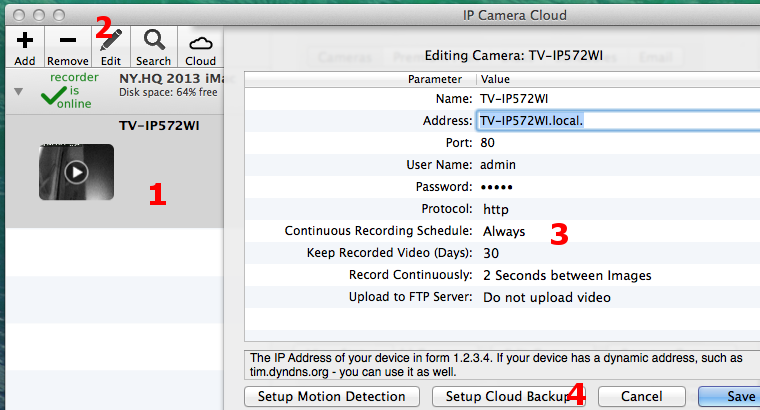
Category: IP Camera CloudHow to Record video to Cloud Servers?Our IP Camera Cloud software can automatically copy video, recorded from your cameras, to our Cloud Servers and store it there for 30 days. Each camera must be configured separately through its Settings Window. Select whether you want to copy to the Cloud all recorded video or events only as shown in the screenshot below.
This will show Setup Cloud Storage window with a simple choice: either copy all video to the cloud or copy events only:
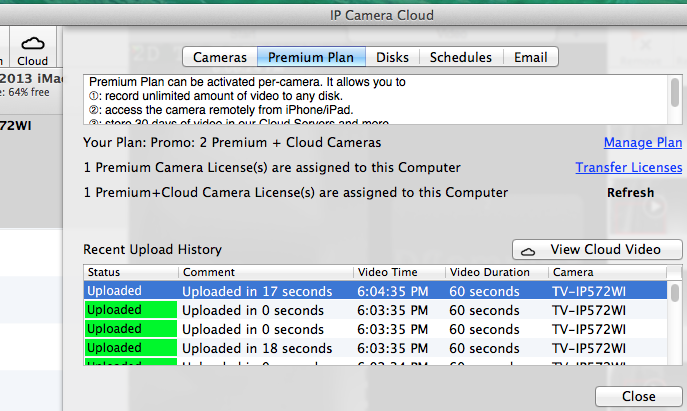
Click the Save button to save the camera configuration and close the Camera Settings. Now you will see computer-wide settings. Select the Premium Plan tab to verify that the video is being uploaded to the Cloud.
The recorded video is uploaded to our Cloud Servers is segments about 1 minute long. See the status of the recently uploaded video clips here, or select one of them and click the View Cloud Video button to watch the video. Or, use this quick shortcut to playback uploaded to the Cloud video at any time from the main app screen: simply select the desired camera in the Cameras sidebar and click the Cloud toolbar button shown in upper-left corner in the above screenshot. The Video Search window will come up showing graphically all recorded video and events, uploaded to the Cloud. Note: it will look exactly the same way as the usual Video Search window that shows video recorded on your hard drives. The only difference is that in former case the video will be downloaded from the Cloud Servers, but in the latter case the video will be shown from your hard drives. When you have the same video available in both places: the Cloud Servers and on your hard drives, we recommend to simply use the Video Search window usign the Search toolbar button. In this case the playback experience will be faster as the video will be displayed from your hard drives as opposed to being downloaded from the Internet. |


